


If you're a super administrator at Buildpeer, you can create new projects so that your entire team can access them.
- In your Buildpeer account, go to the project overview and click on the + Add in the upper right corner.
- A new window will appear where you can import information from an existing project or start a project from scratch:
- To import information from another project, select the desired project and click 'Export', and then in 'Next'. Additional details about the information you can import from another project.
- If you prefer to start from scratch without importing existing information, click 'Next'.

- In the next step, fill in the general information of the project and then click 'Next'. Required fields are Title, Type of project And Time zone. The other fields can be filled in now or modified later once the project has been created.

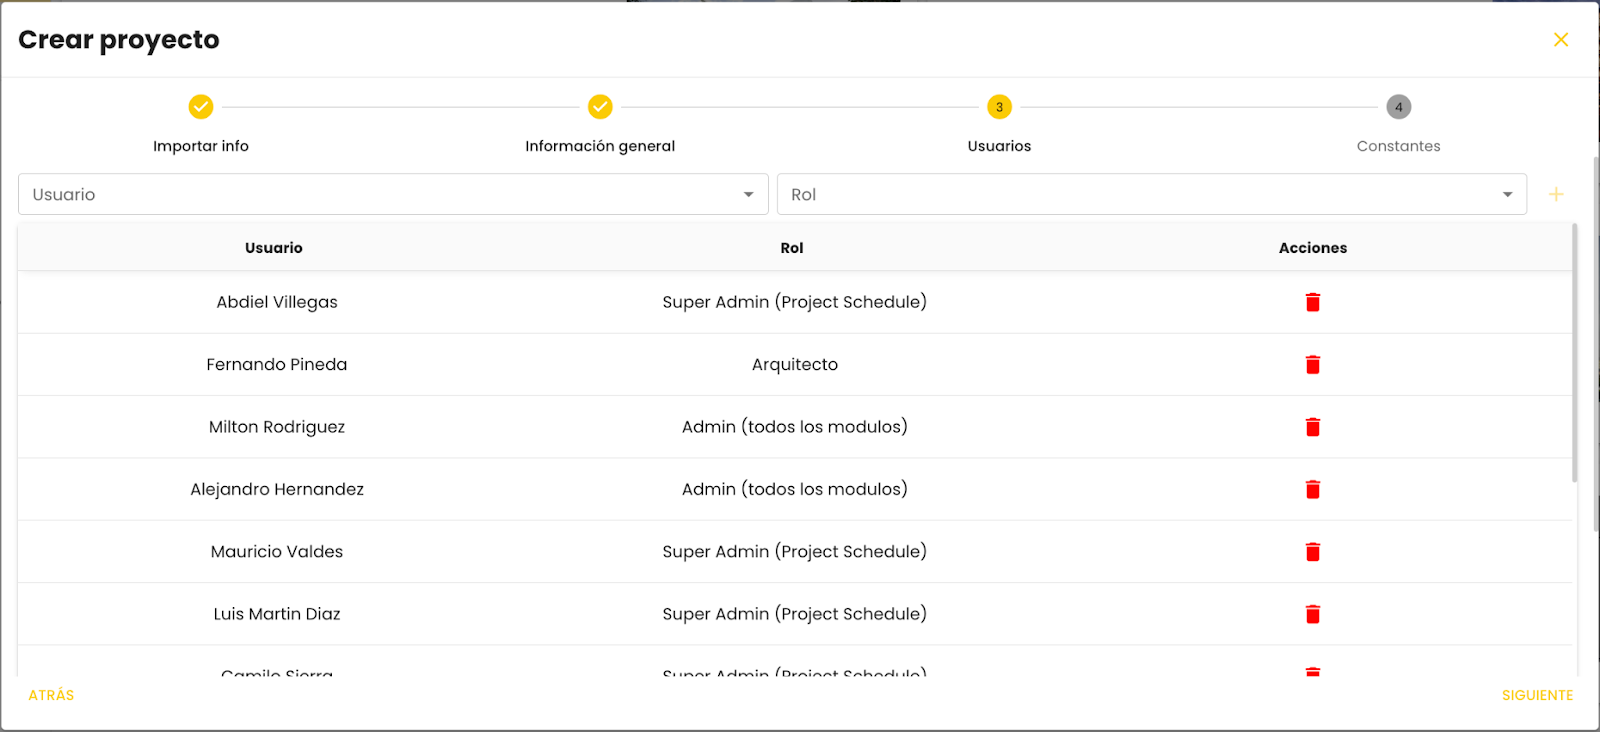
- In the next section, add the users who will have access to the project and assign them a specific role. If you imported information from an existing project, you'll see all the loaded users here and you can make changes if necessary. When finished, click 'Next'.
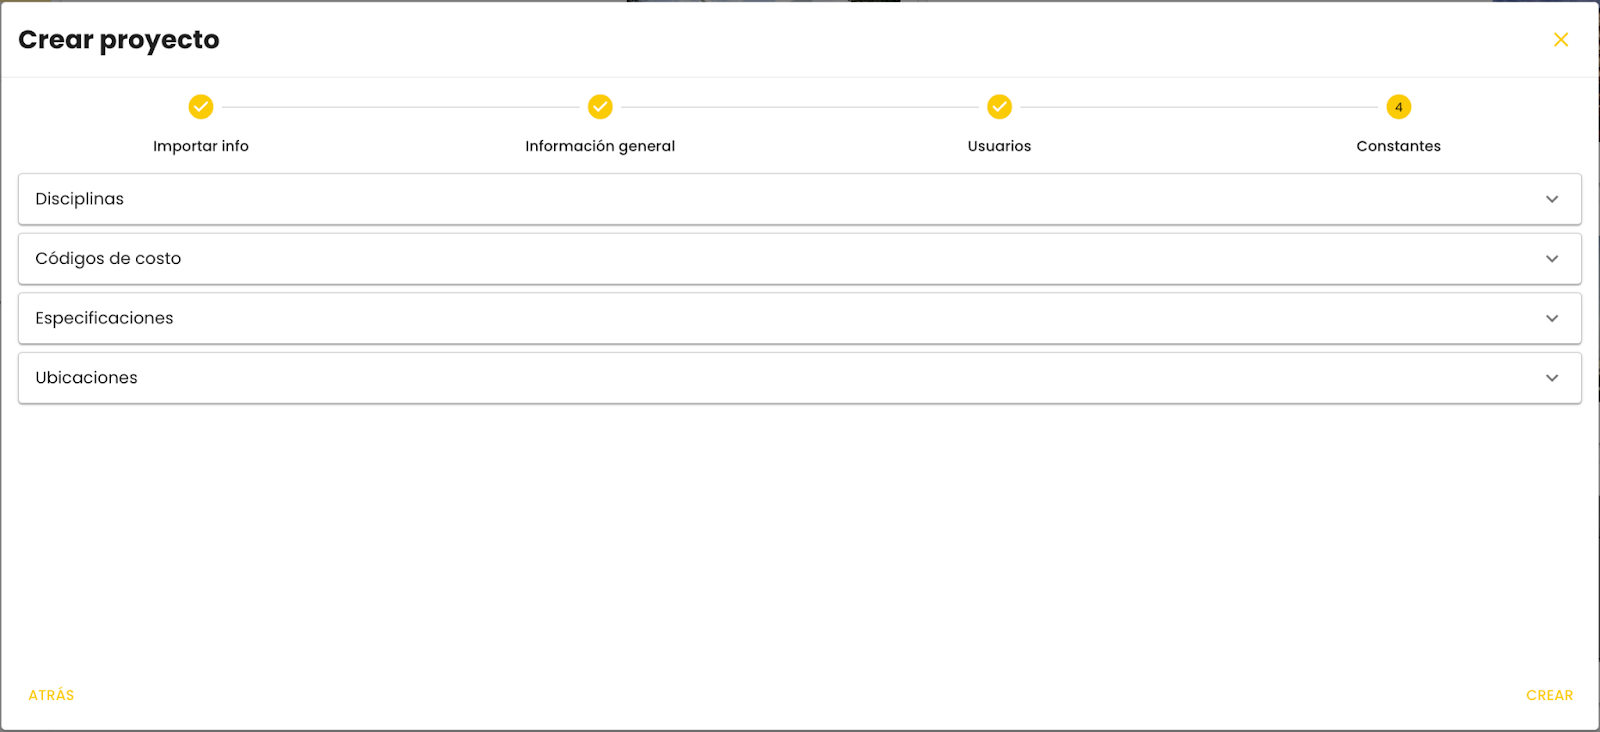
- In the last section, you'll be able to upload all the constant information during the project, such as disciplines, cost codes, specifications, and locations. For more details, see the section on constants in a Buildpeer project. If you imported information from an existing project, you'll see all the information here and you can make changes if necessary. When finished, click 'Create'.
Here are more details about the information you can import from another Buildpeer project:
- Users and Roles: You can import users and their specific roles into the project. This ensures that each member of the team retains their permissions and responsibilities established in the new project.
- Locations: Includes the locations defined in the project, allowing a consistent organizational structure to be maintained. This is especially useful if projects share similar areas or zones.
- Specifications: The technical specifications of the project, such as required materials, standards or standards, can also be imported, ensuring that the new project follows the same guidelines.
- Cost Codes: If you have a coding system for cost control, these codes can be imported. This facilitates financial monitoring and allows maintaining a unified record between projects.
- Disciplines in Plans: You can import the categories or disciplines used in the plans (such as architecture, engineering, electricity, etc.), which makes it easier to organize and visualize the different elements of the project.
Importing these elements from another project not only saves time, but also ensures consistency in management and control between similar projects.
🔖 Constants within a project
We refer to “constant information” when it is repeated or available in several modules of the project.
Disciplines: Disciplines are the different areas of specialization involved in the project, such as architecture, civil, electrical, mechanical engineering, etc. In Buildpeer, disciplines are mainly reflected in the drawings module, allowing the different elements of the project to be organized and categorized according to their specialization.
Cost codes: Cost codes are a classification used to organize and manage the expenses associated with the project. These codes help identify and track costs in different categories, such as materials, labor, subcontracts, etc.
Specifications: The specification tool makes it easy to manage and archive all specifications and revisions, ensuring that project team members always work according to established guidelines and in real time. This resource is available exclusively for use in RFIs and Submittals modules.
Locations: Locations in Buildpeer allow users to segment the project into levels, sectors, stages, or other categories as desired. This segmentation is essential to organize and locate the different elements of the project efficiently.

