


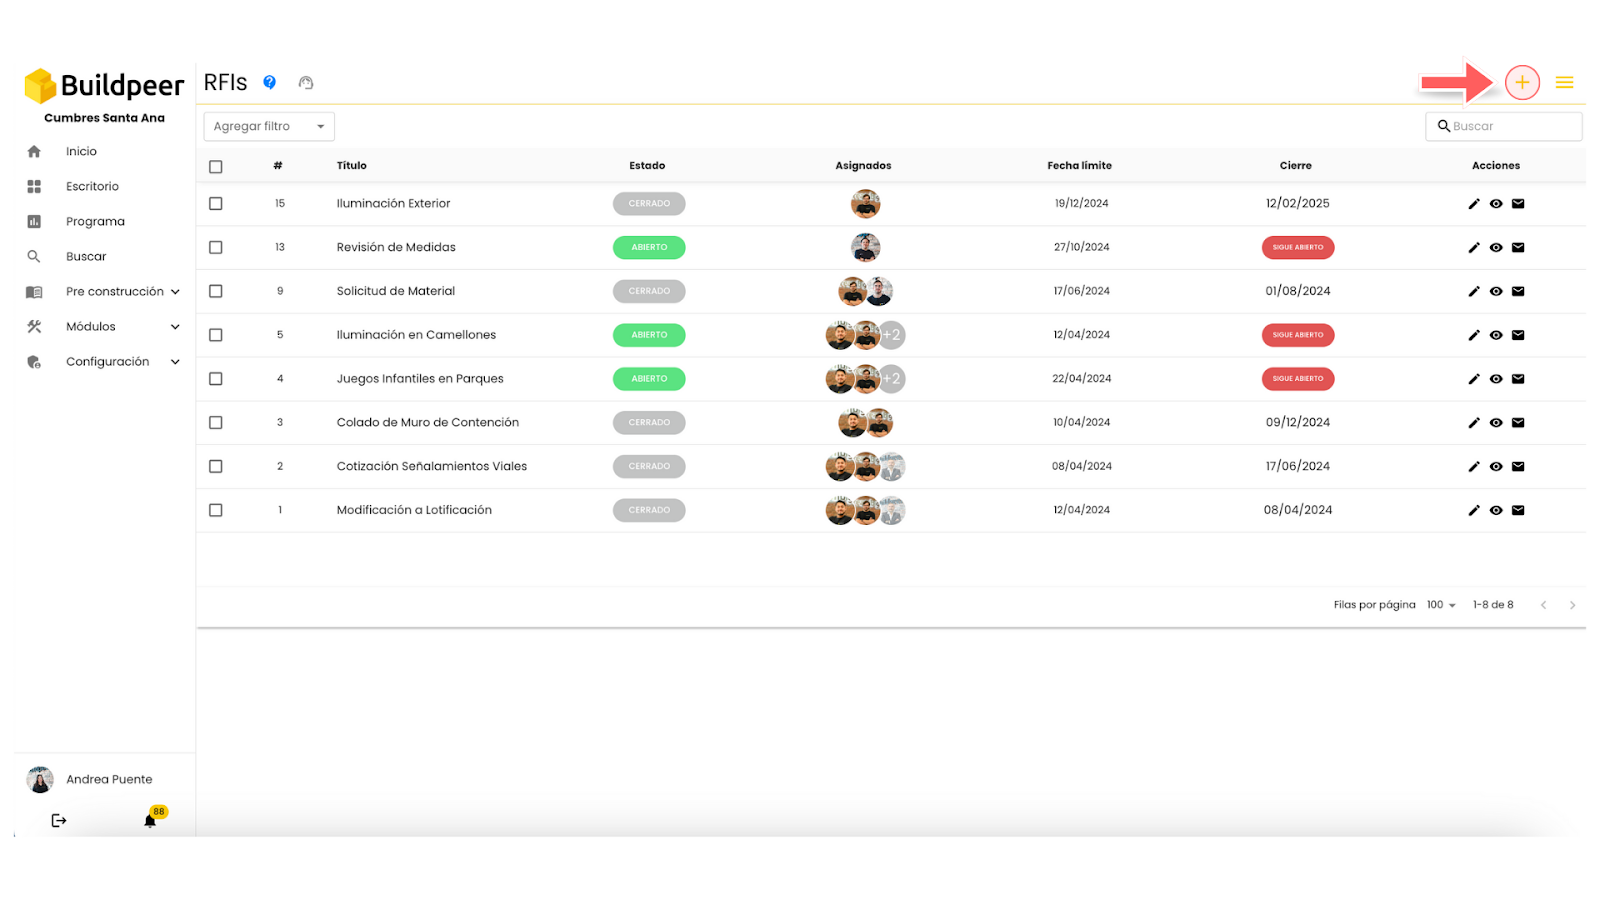
- In your Buildpeer account, go to the project overview and select the project you want to enter.
- In the left sidebar, click on the section 'Modules', and then click on the module 'RFIS'.
- To get started, click on the ➕ Add which is located in the upper right corner of the screen.
-
-
- A card will appear with the fields you need to complete. Here's how to fill them out to manage the RFI properly:
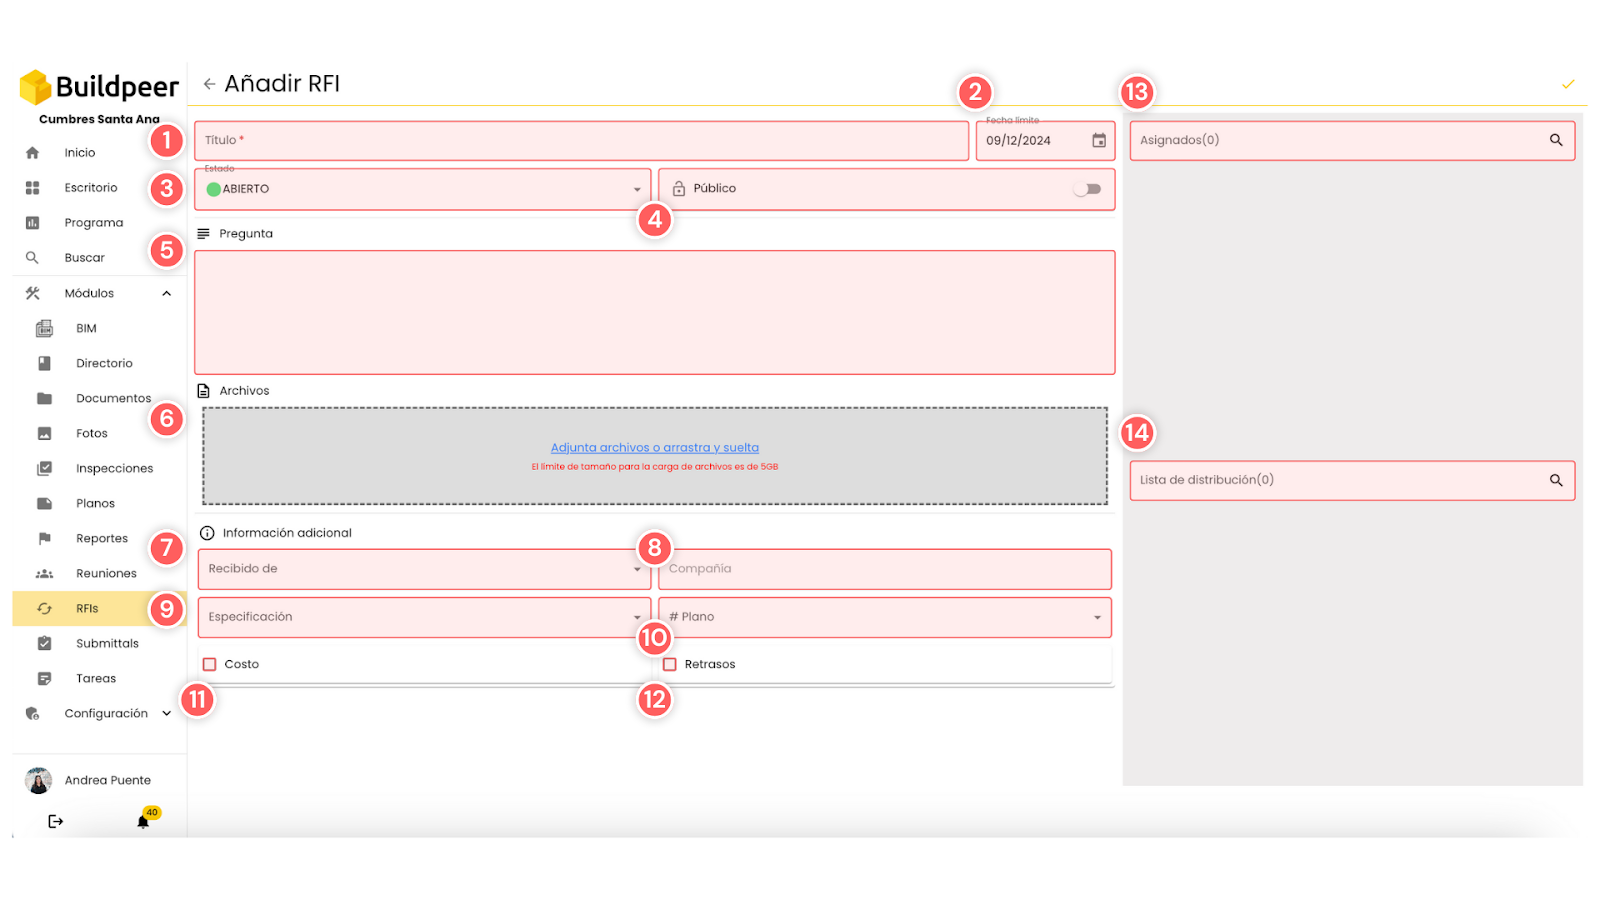
- Title: fill in this field with the name of the RFI you want to create.
- Date of delivery: complete this field with the deadline that those assigned to respond to the RFI have.
- State: you can choose between two options: Open or Draft. The 'Open' option is so that once the RFI is published, assignees can immediately see the created RFI. The 'Draft' option is chosen when creating an RFI has not been completed, so the user can return to finishing detailing the RFI before officially publishing it, and change the status to 'Open'. When an RFI is in 'Draft', only the creator user will be able to view that RFI.
- Privacy: in this field you can define who will have access to the RFI. When you activate the privacy option, only selected users will be able to view it.
- Question: complete this field with the question or question that you want answered through the RFI.
- Archives: attach relevant documents to respond to the RFI or facilitate the resolution of the query. You can upload files in formats such as Word, Excel, PowerPoint, PDF and images.
- Received from: select a user if the question or question comes from another person.
- Company: this field will be automatically filled with the company of the user you selected in the previous step.
- Specification: select an existing specification or add a new one as needed.
- Plan: select a project plan if the RFI is related to a specific one.
- Cost: enter a monetary amount if the RFI involves an associated cost.
- Delay: select the number of days and/or hours of delay if the RFI is impacting the project schedule.
- Assigned: select the person or persons responsible for answering the RFI.
- Distribution list: selects users who will be able to view the RFI, but not interact with it. This field is useful for keeping those who are not in charge of responding informed.
✏️ Required fields for creating an RFI
- Title
- Deadline
- Assigned
- Question
- To finish, click on the ✅ button Create which is located at the top right of the screen.
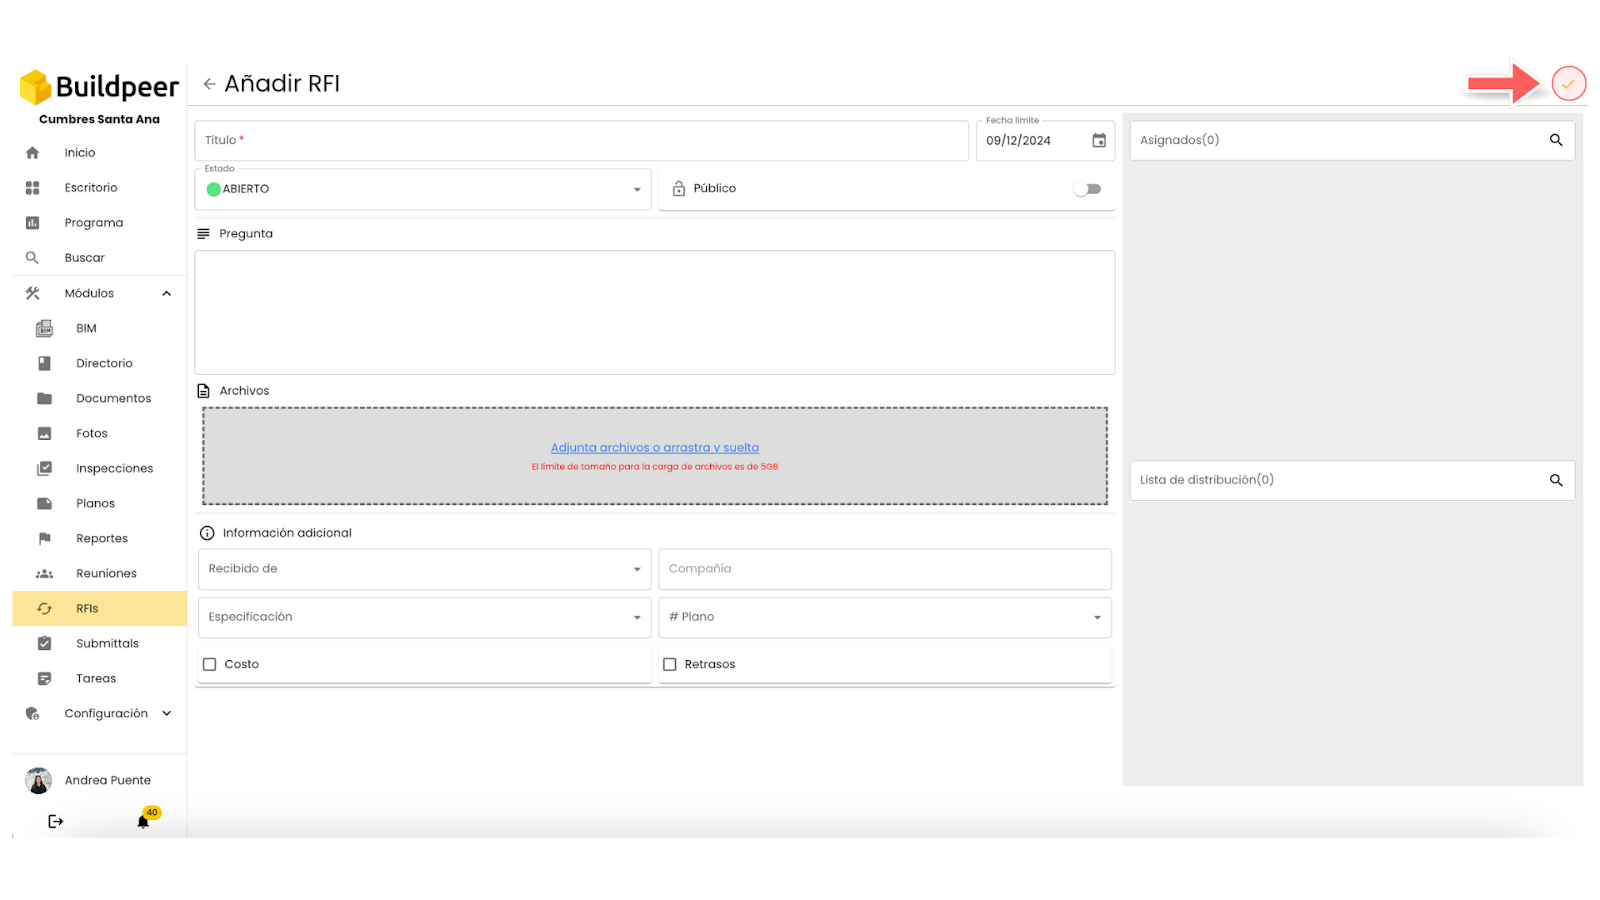
- Now your RFI is created and available on the main screen of the module to be viewed and answered.

