


- In your Buildpeer account, go to the project overview and select the project you want to enter.
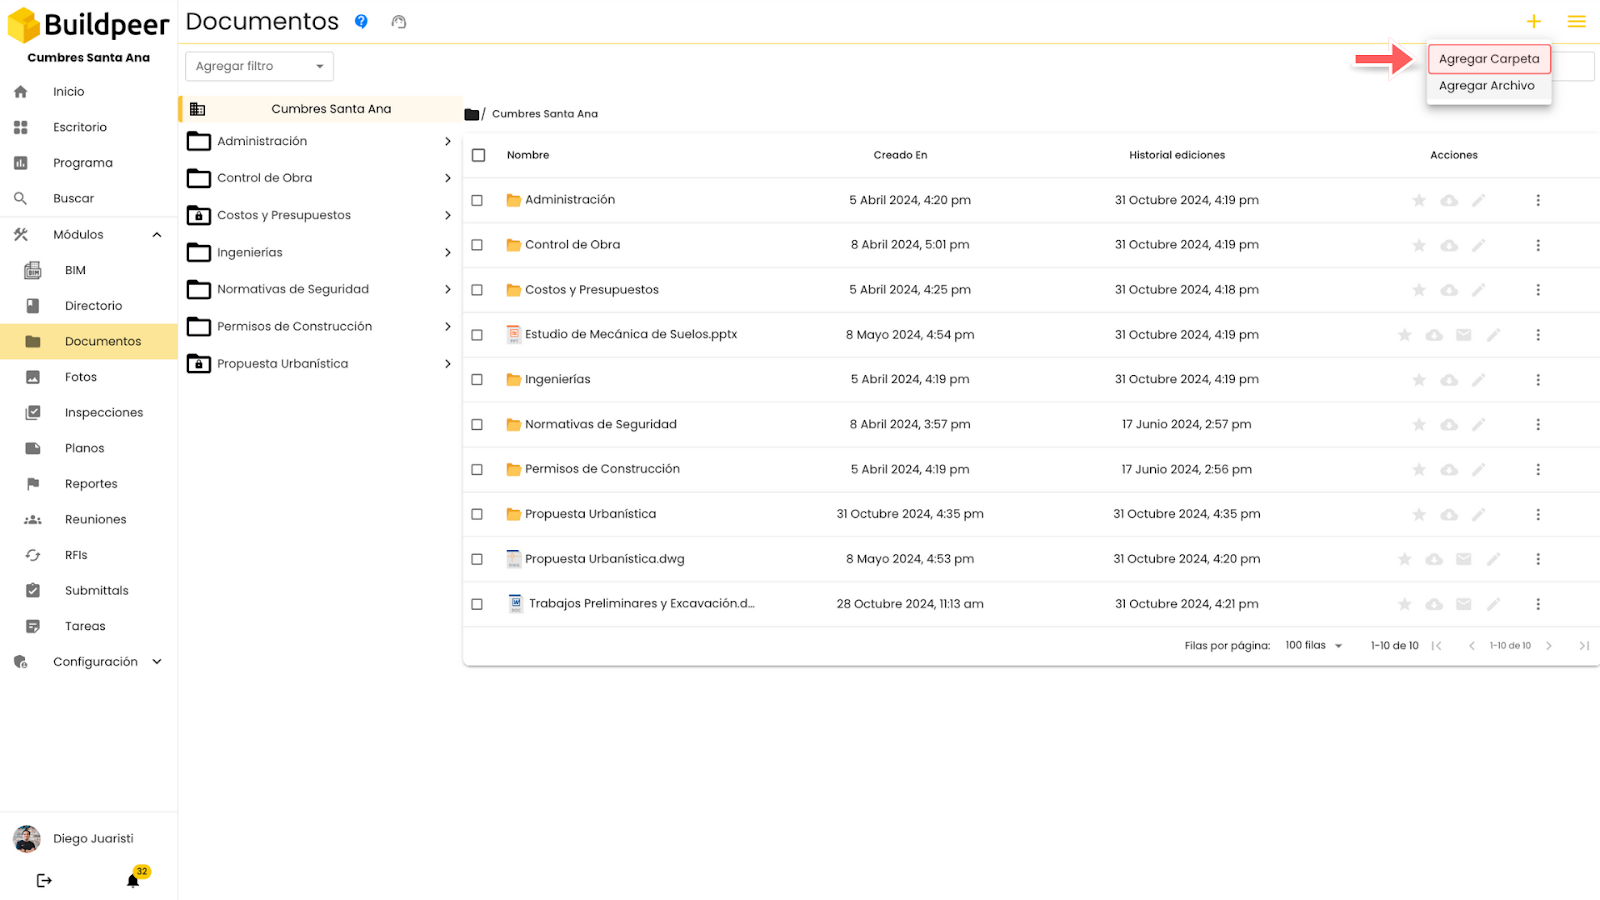
- In the left sidebar, click on the section 'Modules', and then click on the module 'Documents'.
- To begin the process, click on the ➕ Add, which is located in the upper right corner. Then, click 'Add Folder'.
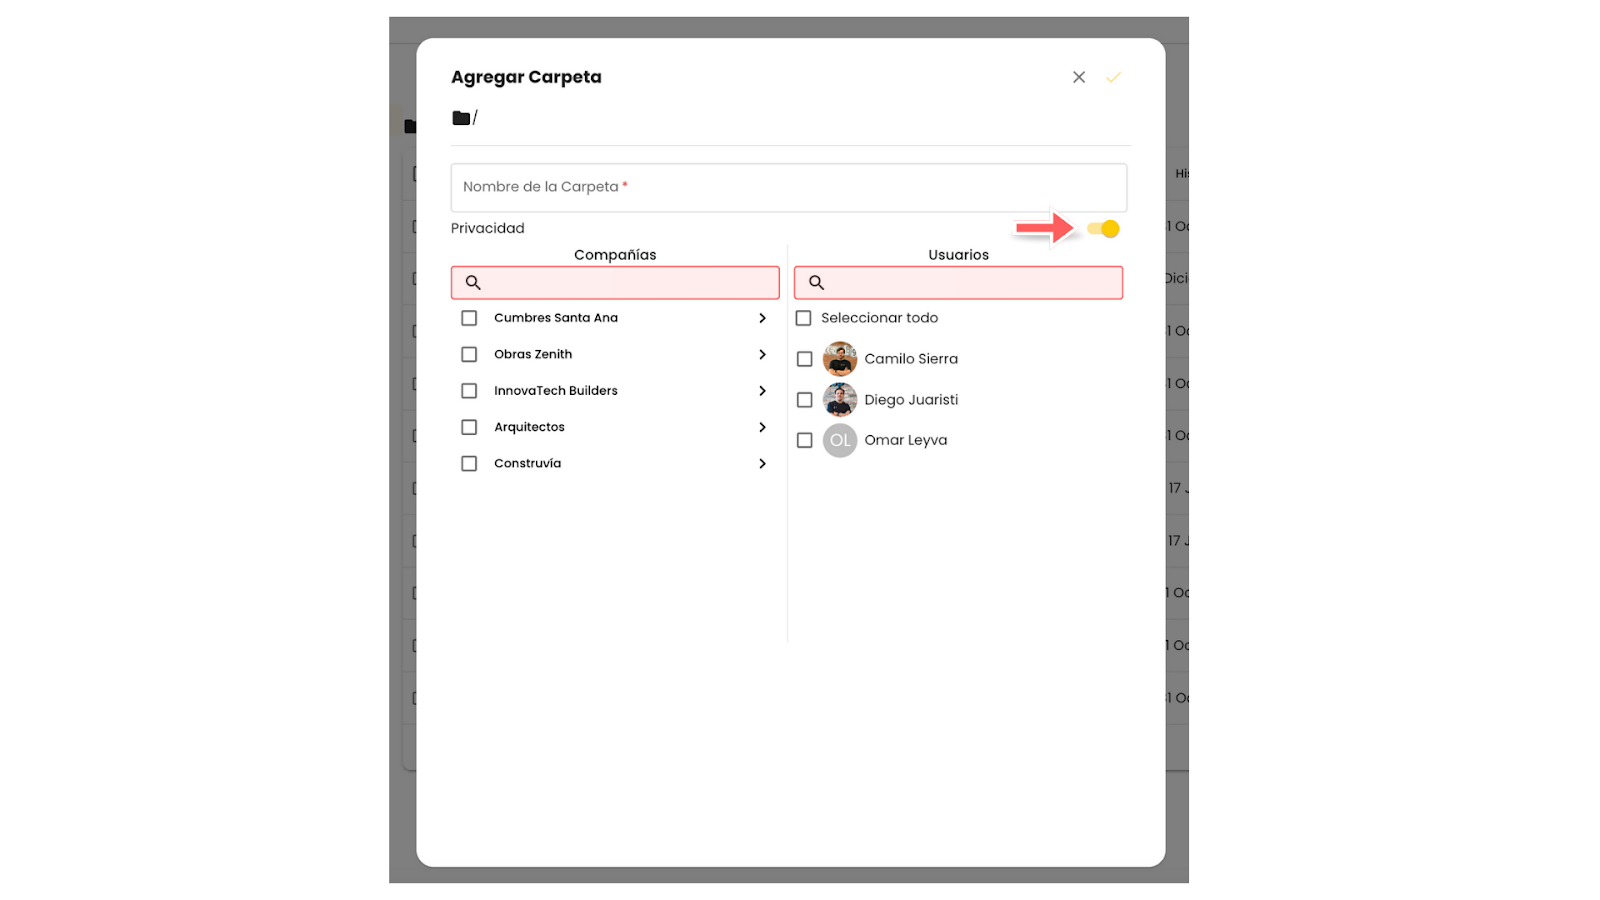
- A window will open where you can enter the name of the folder you want to create.

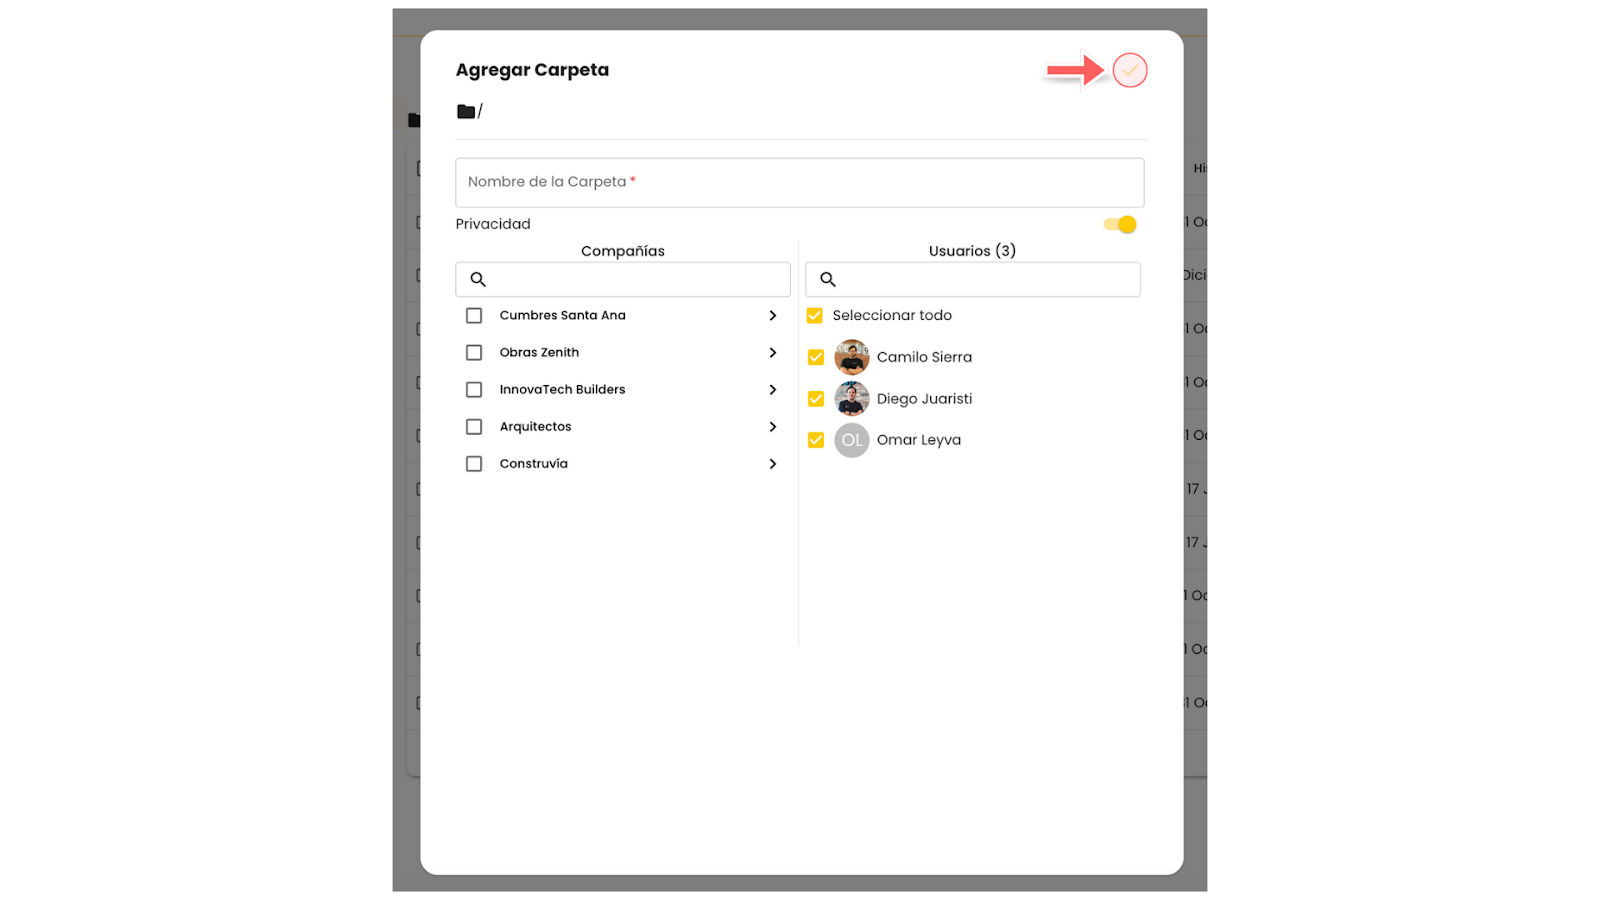
- In this new window, if you want the folder to be private, click the privacy switch and then check the boxes next to the companies or users you want to add to the folder.
- To finish, click on the 'Add', which is located in the upper right part of the window.
If after creating your folder you want to change its privacy, you can still do so. Learn more about how to modify the privacy of a folder.

