


- In your Buildpeer account, go to the project overview and select the project you want to enter.
- In the left sidebar, click on the section 'Program'.
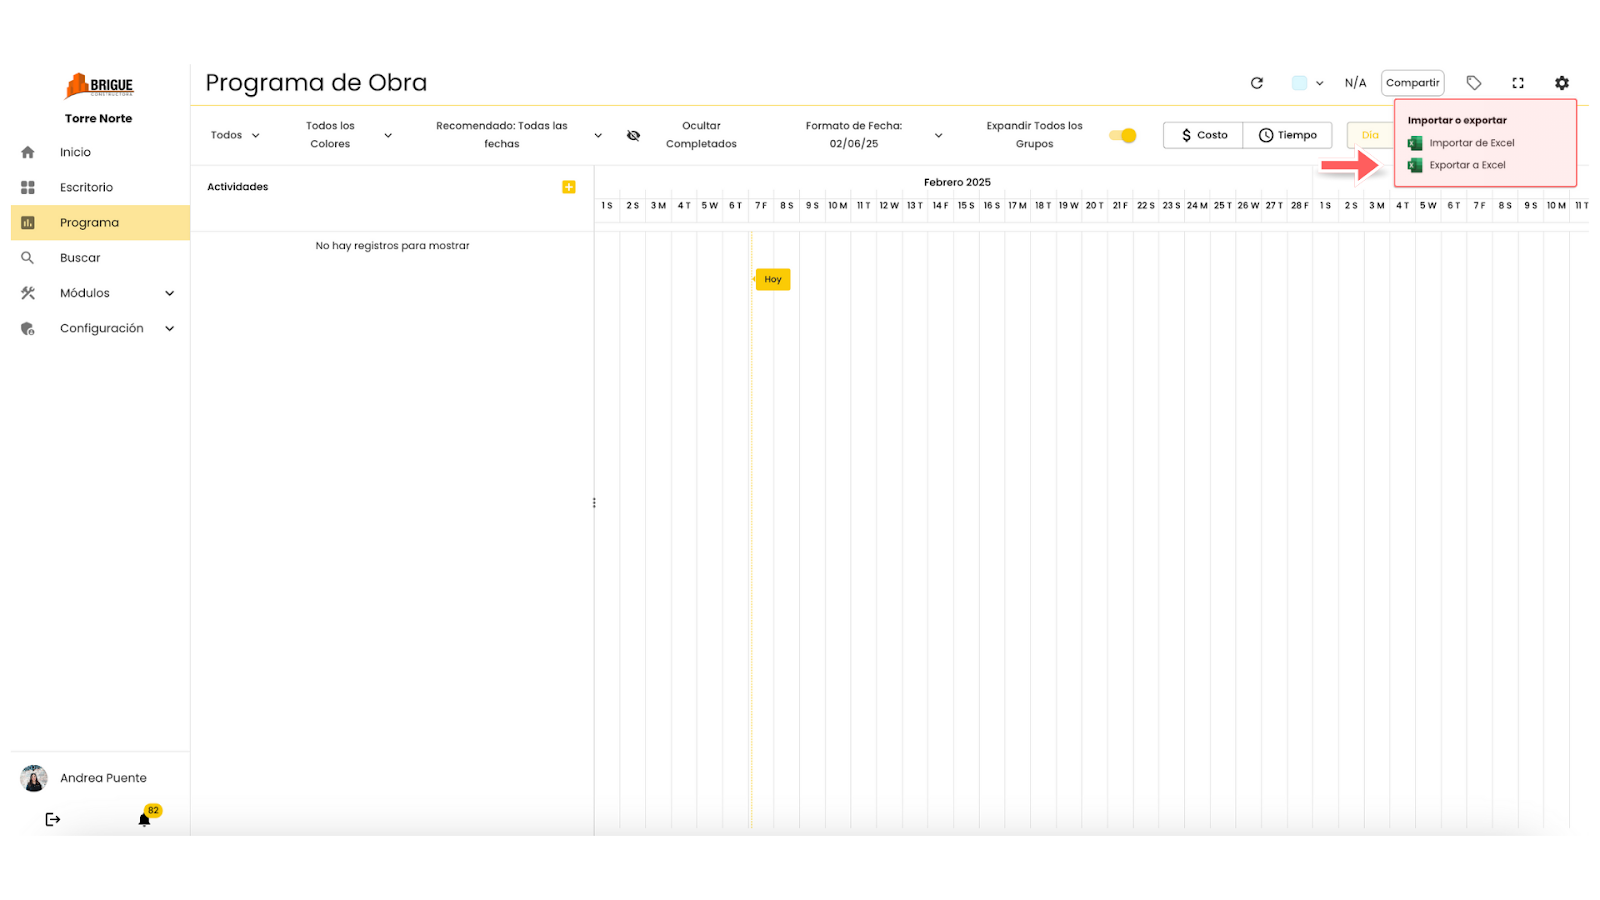
- Click on the ⚙️ icon Import or export in the upper right corner and then select 'Import'.
- A window will appear from which you can download the template in Microsoft Excel format. Click the link to start the download.

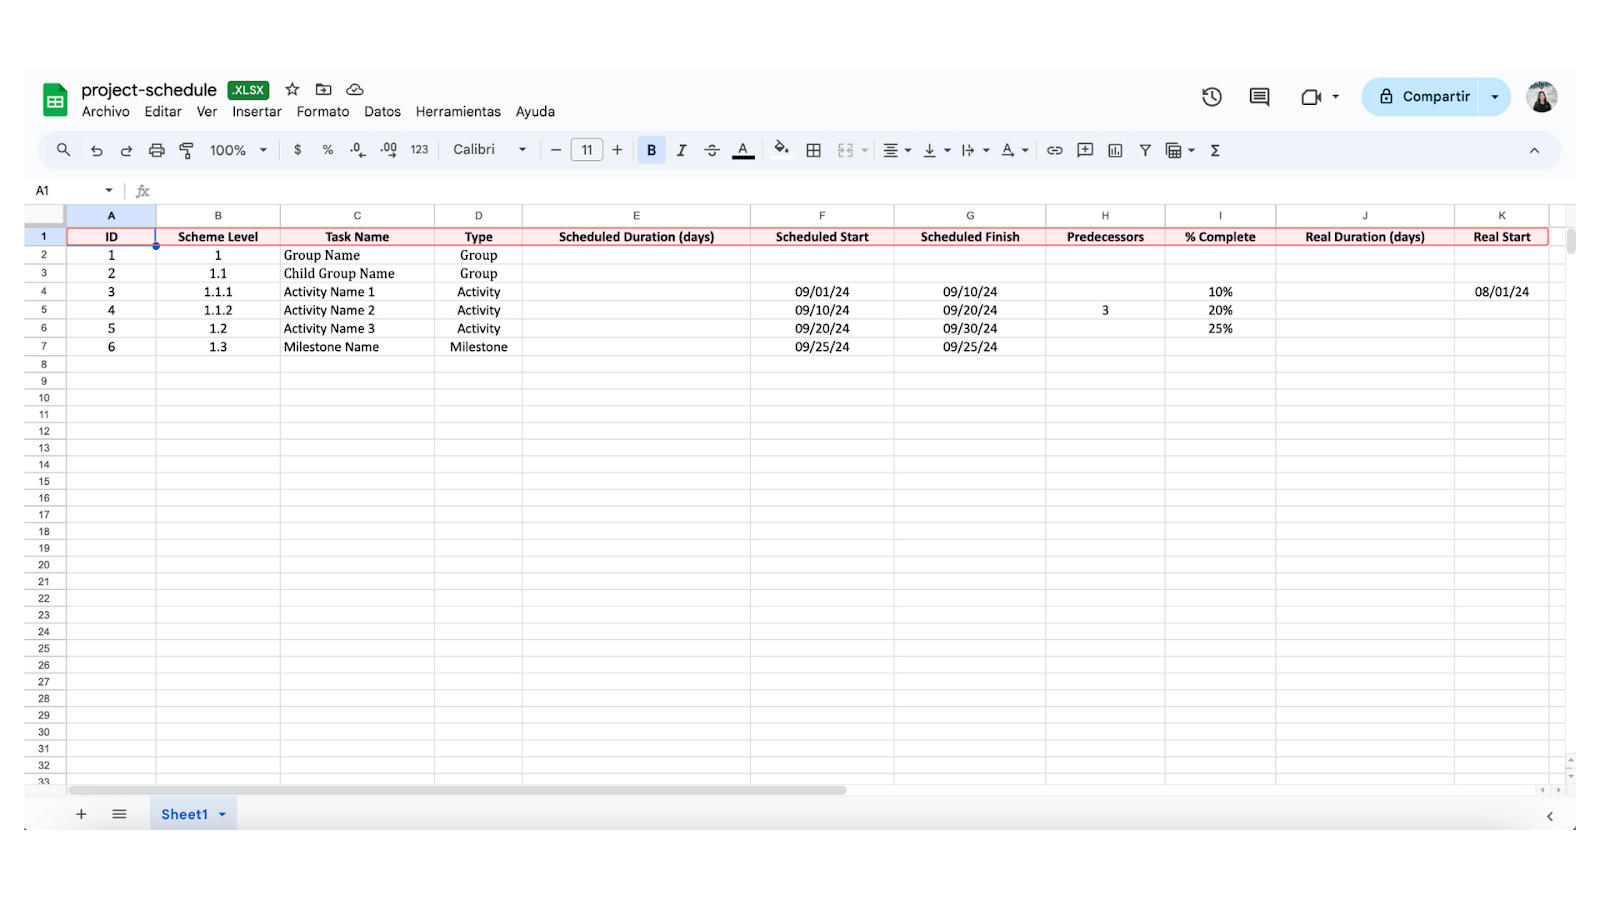
- When you open the downloaded file in Microsoft Excel, start entering your information in each of the visible columns. Keep in mind that the data included is only examples and you can delete it to enter your own. The only thing you shouldn't modify or delete are the column headings.
📋 Definition of fields in a template
Next, we'll explain each of the fields included in our template to you. This will help you understand their use and meaning, so you can organize your information properly.
ID
This number acts as a unique identifier for each group and activity in the work program, facilitating their monitoring and reference. List each element consecutively, starting from 1.
Hierarchy Number
This number indicates the hierarchical structure of the work program. It allows you to see which activities depend on each group and how many groups are part of the complete program.
Activity Name
It is the title assigned to each task, group or milestone within the program, which clearly and precisely describes the nature of the element.
📌 Note:
Keep in mind that two or more activities within the same group must have unique names.
Type
Specifies whether the element is a group, activity, or milestone. Even if there are subgroups, they should be marked as groups to maintain consistency.
Scheduled Duration (days)
Indicate the number of days planned to complete an activity, from start to finish, depending on the initial plan.
Scheduled Start
The date on which an activity is scheduled to start according to the original schedule. This field must be in the format of 'Date' in Microsoft Excel.
Scheduled End
The date on which an activity is due to end, according to the initial plan. This field must be in the format of 'Date' in Microsoft Excel.
Predecessors
These are the activities that must be completed before a new activity can begin. These dependencies help determine the flow and order of the program. The predecessors are indicated using the ID number of the corresponding activities.
% Completed
The percentage of progress that reflects how much of the activity has been completed so far. This field must be in the format of 'Percentage' in Microsoft Excel.
Actual Duration (days)
The number of days it actually took to complete an activity.
Real Home
The date on which the activity actually began, depending on the progress on site. This field must be in the format of 'Date' in Microsoft Excel.
Real End
The date on which the activity was actually completed, based on the actual monitoring of the project. This field must be in the format of 'Date' in Microsoft Excel.
Budget
The estimated cost allocated for each activity within the work program, according to the financial plan. This field must be in the format of 'Coin' in Microsoft Excel.
🚨 Required fields in the template
Below, we'll tell you which fields are required when uploading information using the template, organized by group, activity or milestone.
Required fields for groups
ID
Hierarchy Number
Activity Name
Type
Required fields for activities
ID
Hierarchy Number
Activity Name
Type
Scheduled Start
Scheduled End
Required fields for milestones
ID
Hierarchy Number
Activity Name
Type
Scheduled Start
Scheduled End
📌 Note:
For milestones, the scheduled start and end dates must be the same.
📅 Dates
Our template accepts several date formats for work program activities, depending on the language you're using. The supported formats are as follows:
Spanish:
BY MMM AAAA
AND MMM, AAAA
DD Month, YYYY
DD-MM-AAAA
DD.MM.AAAA
DD/MM/AAAA
English:
MM/DD/YYYY
MM-DD-YYYY
MM.DD.YYYY
MMM DD, YYYY
MMM BY YYYY
Month DD, YYYY
- Now that you have completed the information for your work program in the Microsoft Excel template, save the file in .xlsx format with the name you prefer, since Buildpeer does not require a specific name.
- Return to the module of 'Program' in Buildpeer and click on the ⚙️ icon Import or export in the upper right corner and then select 'Import'.
- Then, click on the button 'Choose File' to open a window from where you can select the Excel file you want to upload.
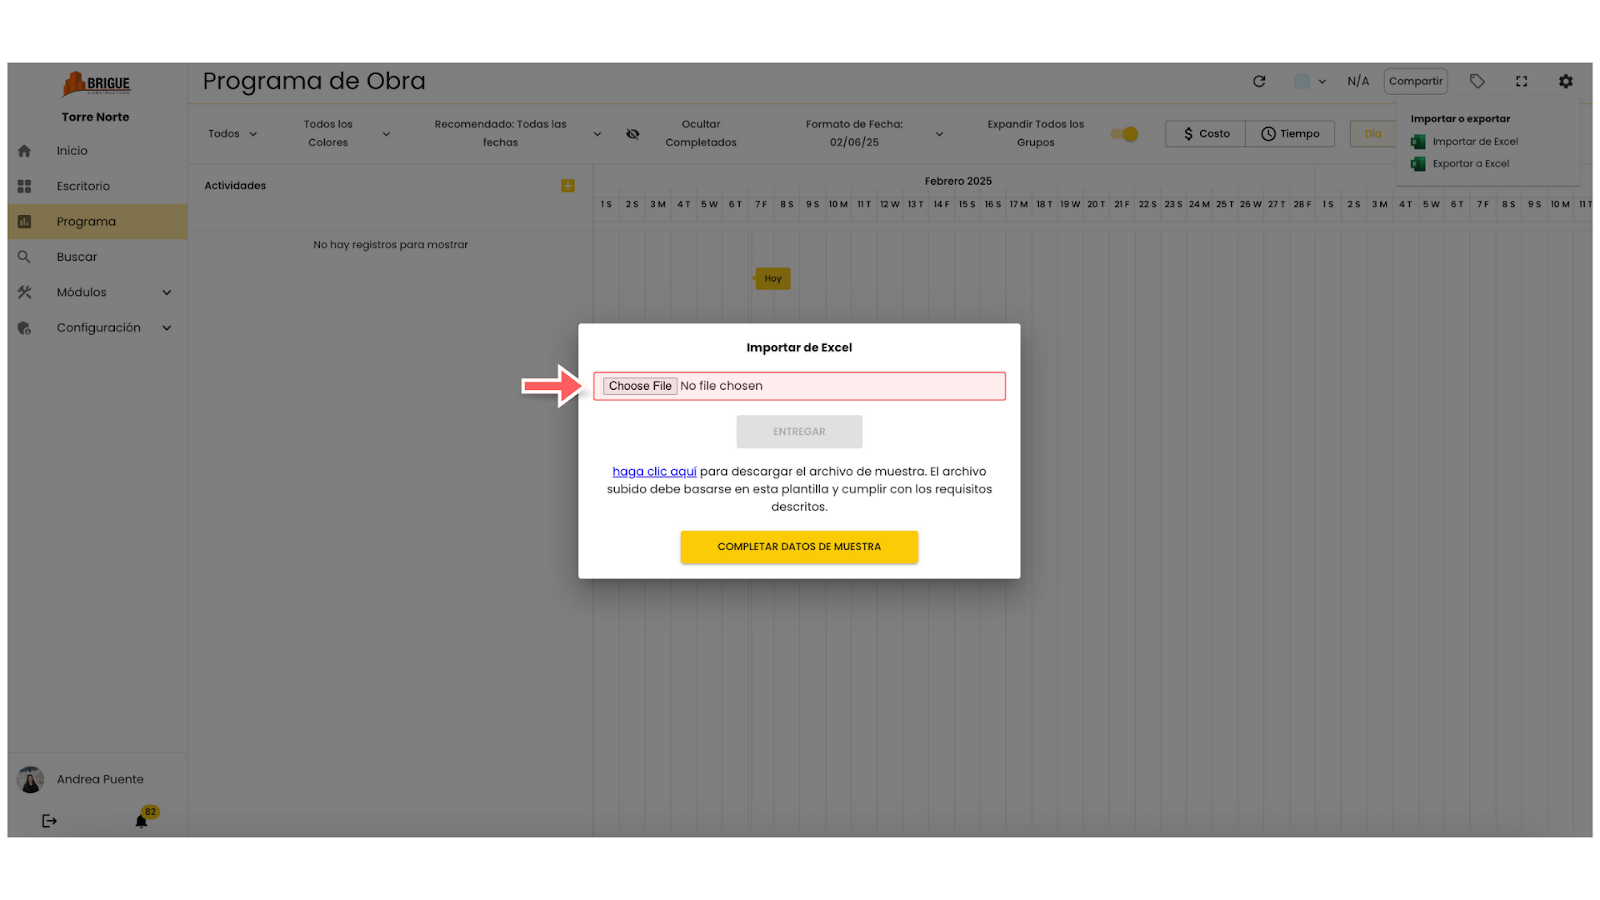
- Finally, click 'Deliver' And that's it! You'll see a confirmation message, and your work schedule will be available for viewing.

From here, you can add all the additional information you need directly to Buildpeer.

