


- In your Buildpeer account, go to the project overview and select the project you want to enter.
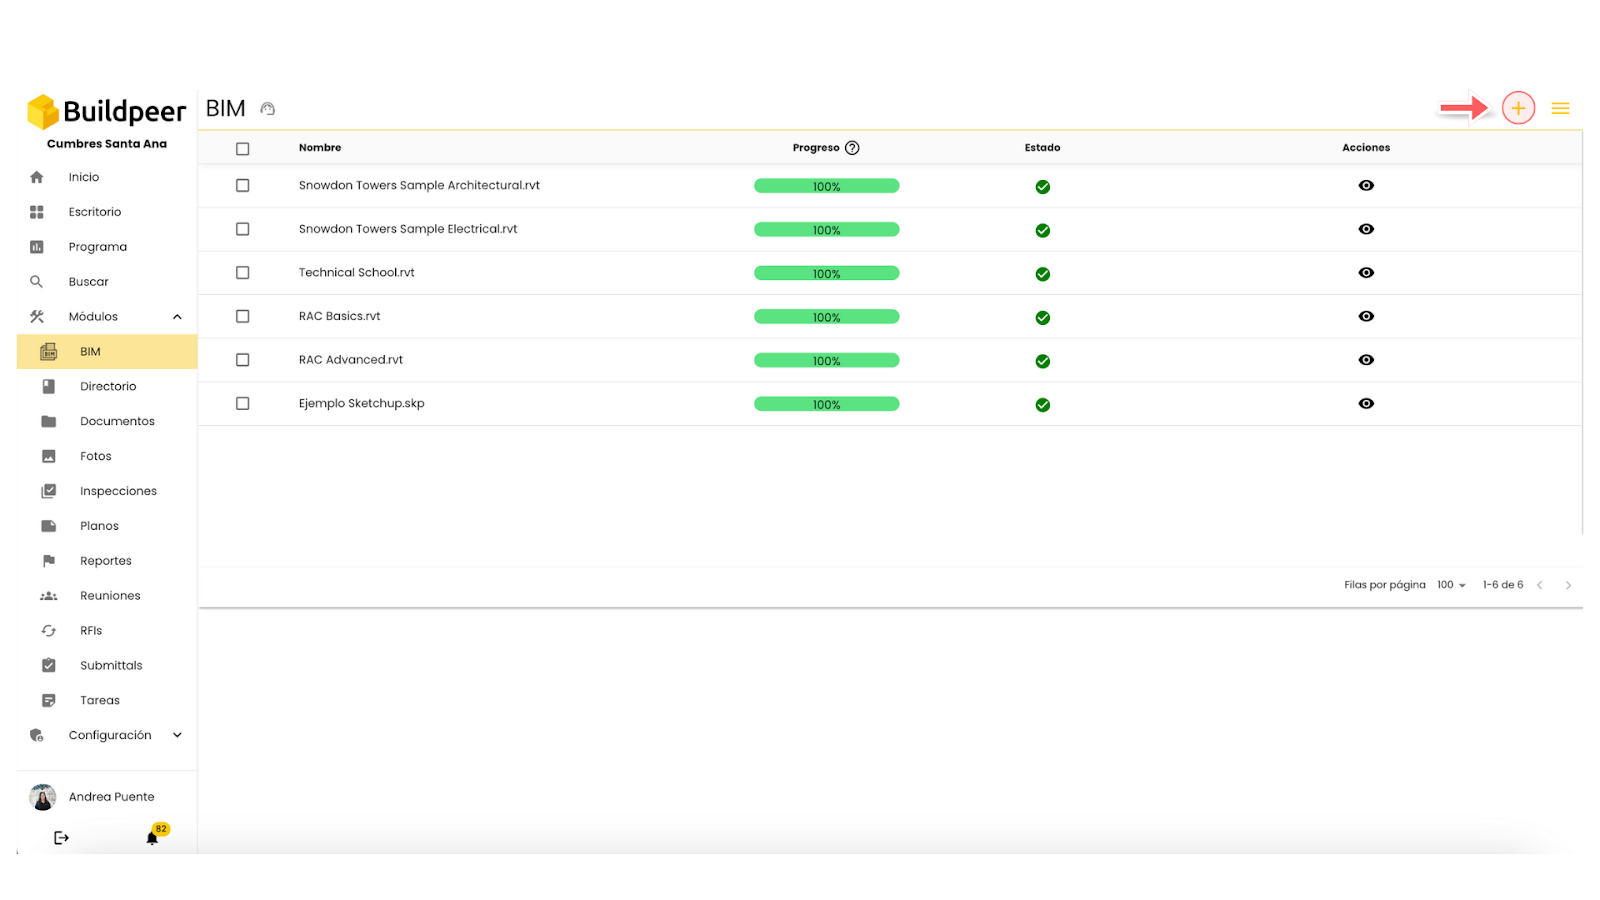
- In the left sidebar, click on the section 'Modules', and then click on the module 'BIM'.
- To start, click on the ➕ Add which is located in the upper right corner of the screen.
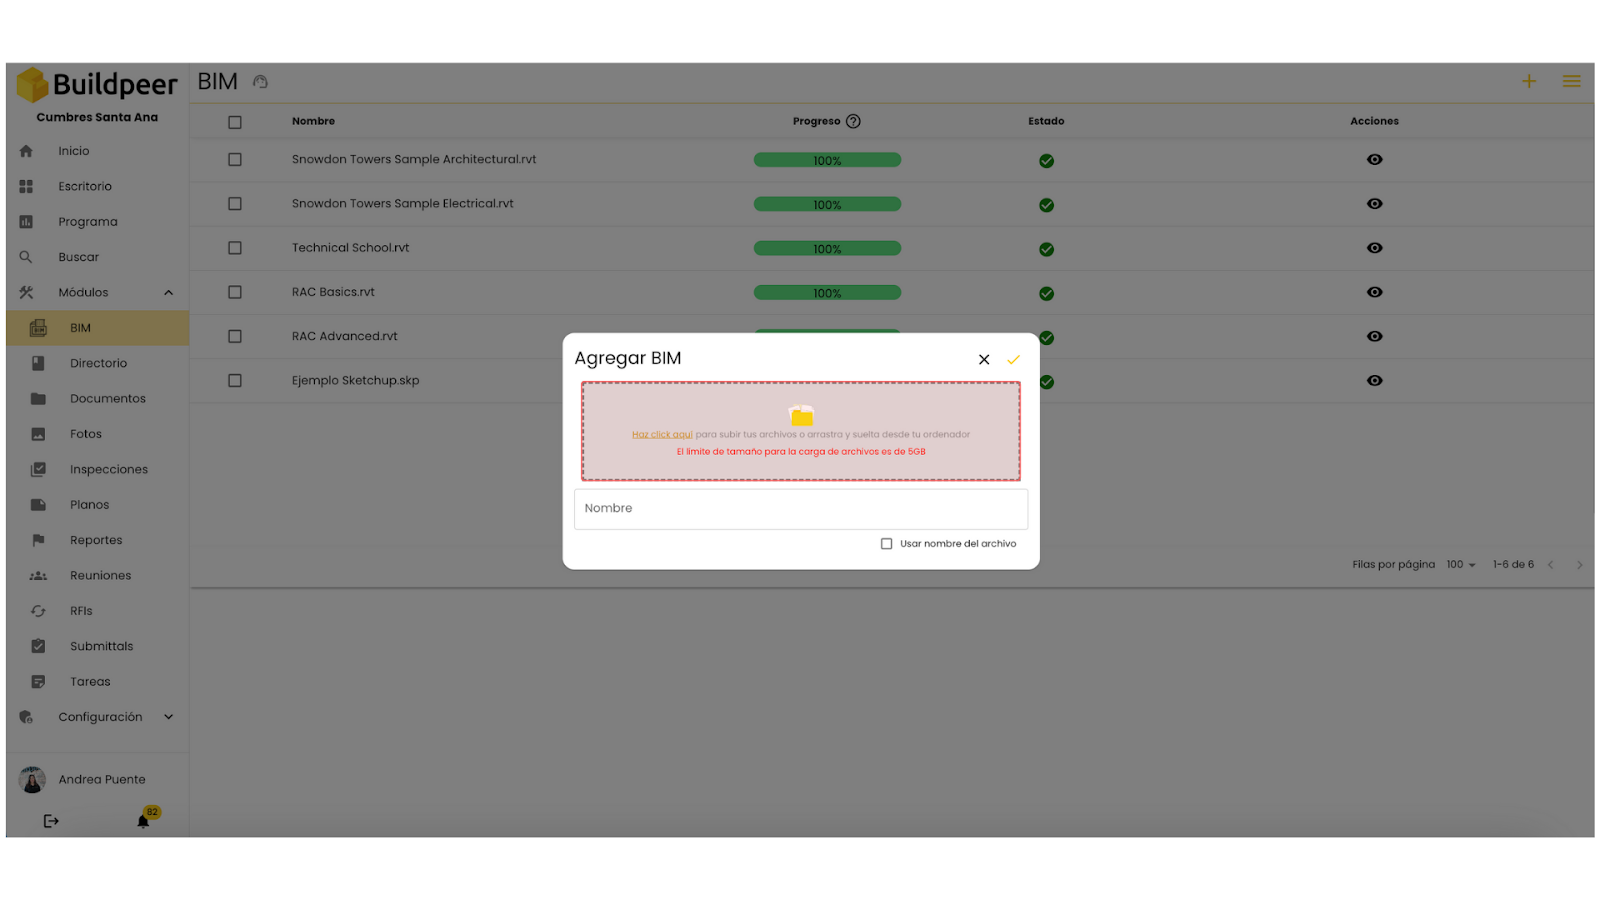
- A new screen will open where you can upload files in format .rvt And .skp. You can drag the files directly to this tab or click to open your device's browser and select the file you want to upload.
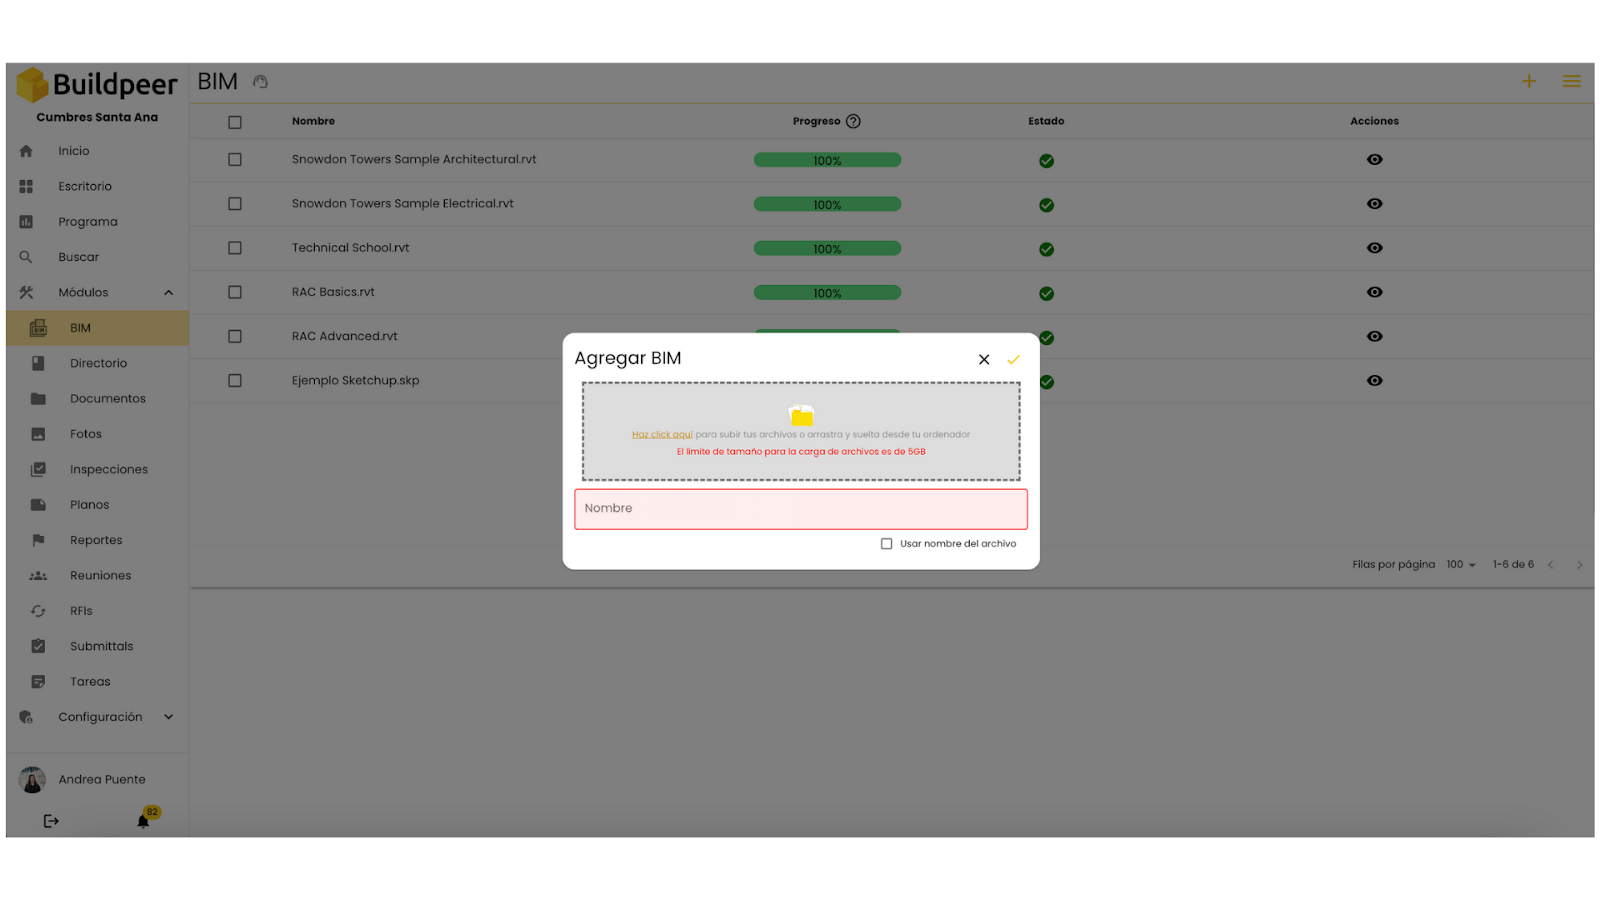
- Add the “Name” field, where you can type the name you want for the file. If you prefer to keep its original name, check the box below the field.
- To complete the process, be sure to click on the ✅ Charge located in the right corner of the tab.
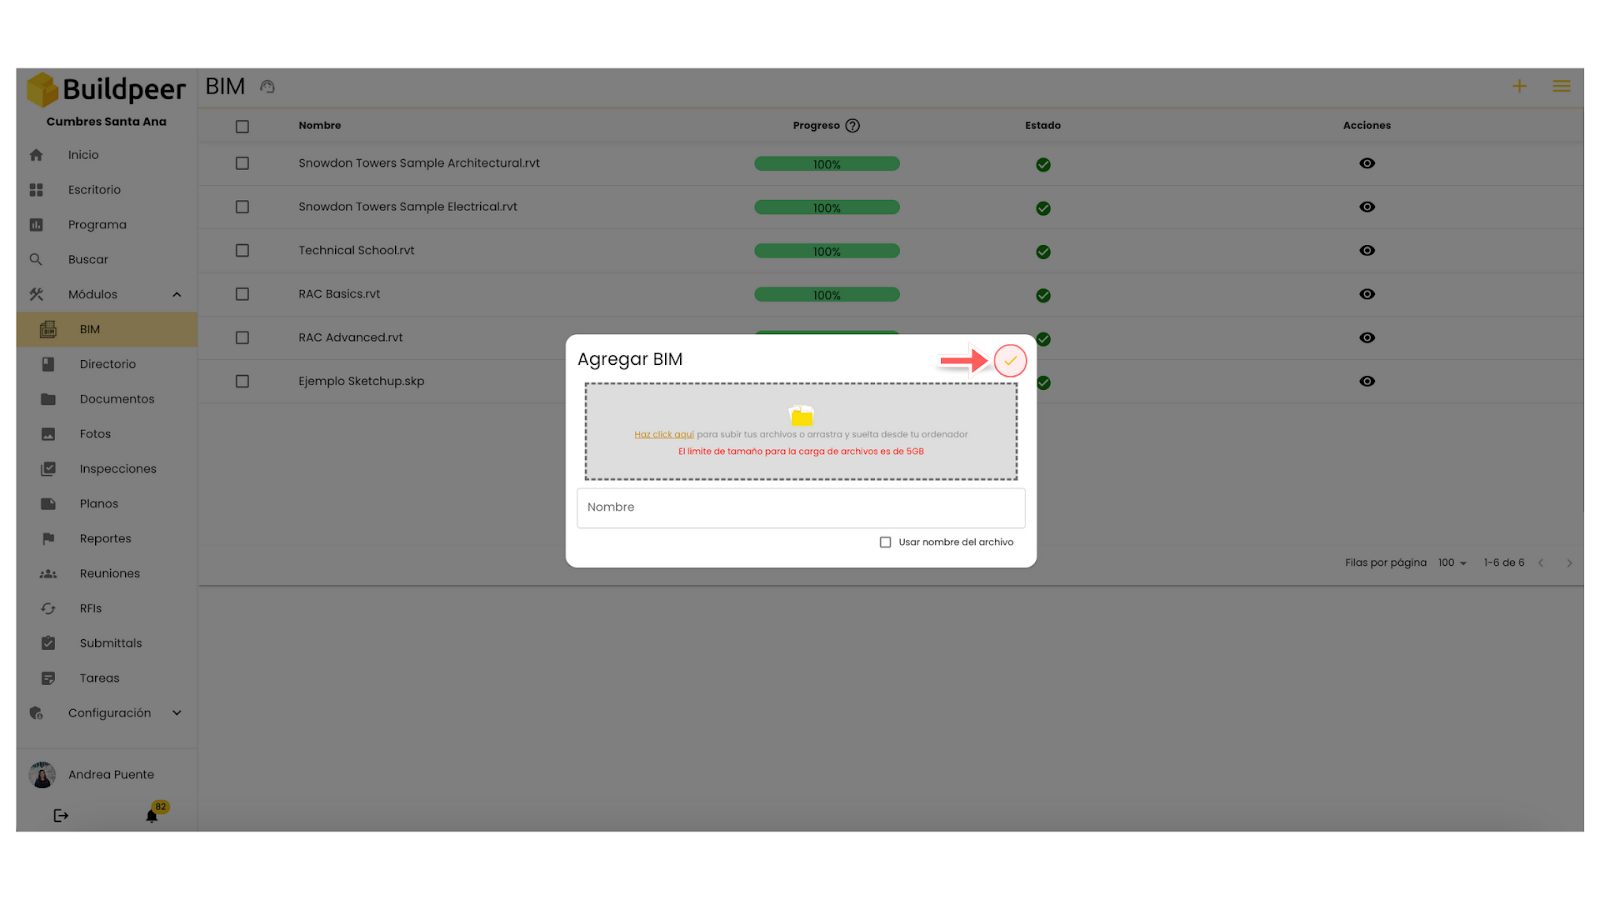
- Now your file is ready to be viewed and will appear on the main screen of the module. Learn more about how to view a BIM file.

