


- In your Buildpeer account, go to the project overview and select the project you want to enter.
- In the left sidebar, click on the section 'Modules', and then click on the module 'Inspections'.
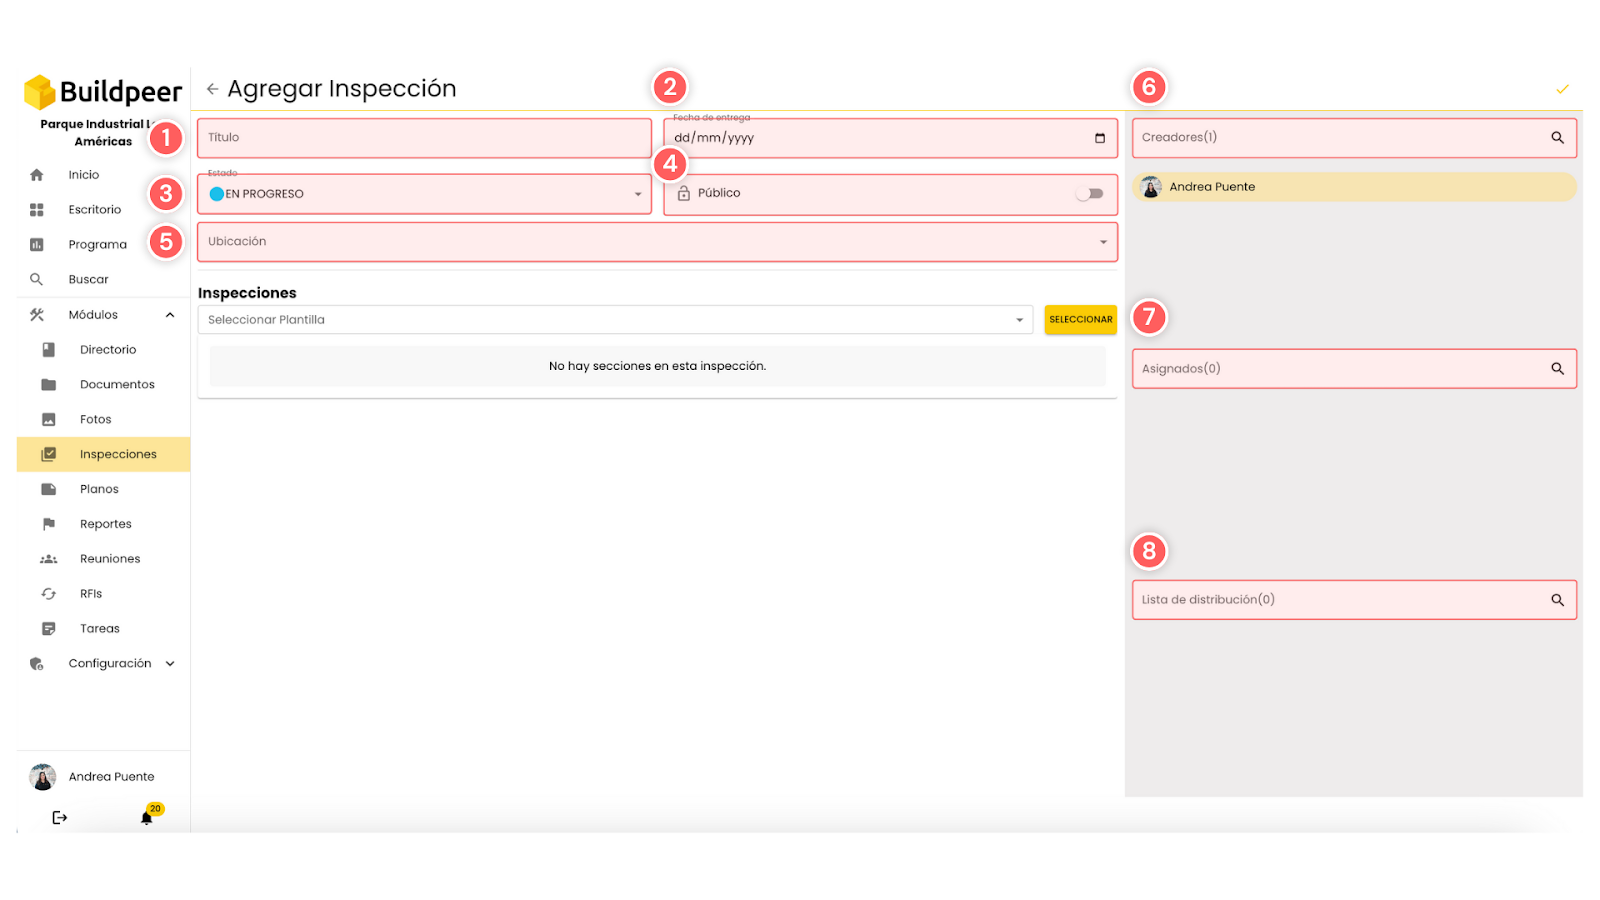
- At the top right, click on the ➕ iconAdd.
- You will now be able to view the fields needed to configure and create the inspection.
Below, we explain each of them to you so that you can complete them properly:
- Title: Type the title you want to assign to the inspection. This should be brief and descriptive.
- Date of delivery: Indicates the deadline for completing the inspection.
- State: you can choose between two options: Eraser O In progress. Select 'Eraser' if you don't want to publish the inspection yet, allowing you to make adjustments before it's available. If the inspection is already ready to be worked on by those assigned, select 'In progress' to indicate that they should start executing it.
- Privacy: Define if the inspection will be visible only to you (private) or will be available to other users of the team (public).
- Location: select a location previously registered in the project or add a new one, thus linking the inspection to the corresponding location.
- Creators: by default, your name will appear in this list, but you can manually add more creators who participate in configuring the inspection.
- Assigned: defines the people responsible for carrying out the inspection. They will be responsible for completing it.
- Distribution list: includes people who need to be informed about the inspection, but who will not have direct responsibility for its execution.
- Once you have completed these fields, click 'Select template'. A list of the available templates will appear; choose the one you want to use for this inspection and confirm your selection by clicking on 'Select'.

📌 Note: If you don't have a template that fits your needs, you can select 'Quick template' to create sections and elements directly in this inspection. However, if it's a list you're planning to reuse, we recommend creating a template for added convenience. Check out our guide to learn more about creating inspection templates.
End the process by clicking on the button ✅ Create located in the upper right corner.

